Stone Masonry – There’s a Method to the Madness!

It’s true. Some of our most valuable lessons are learned from our mistakes. But why make unnecessary and costly errors, especially when it comes to something as permanent and visible as stone masonry?
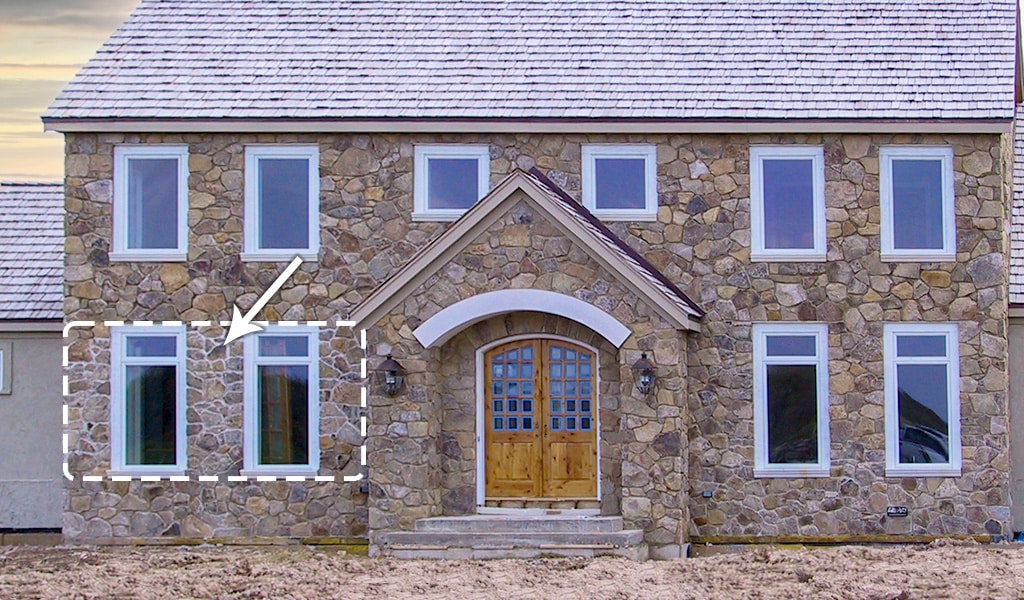
 So we’re passing along some lessons learned about the step-by-step process of installing natural thin building stone veneer and the details of what makes a finished installation look good, which aren’t always as obvious as you’d think…

The Art of Stone Masonry

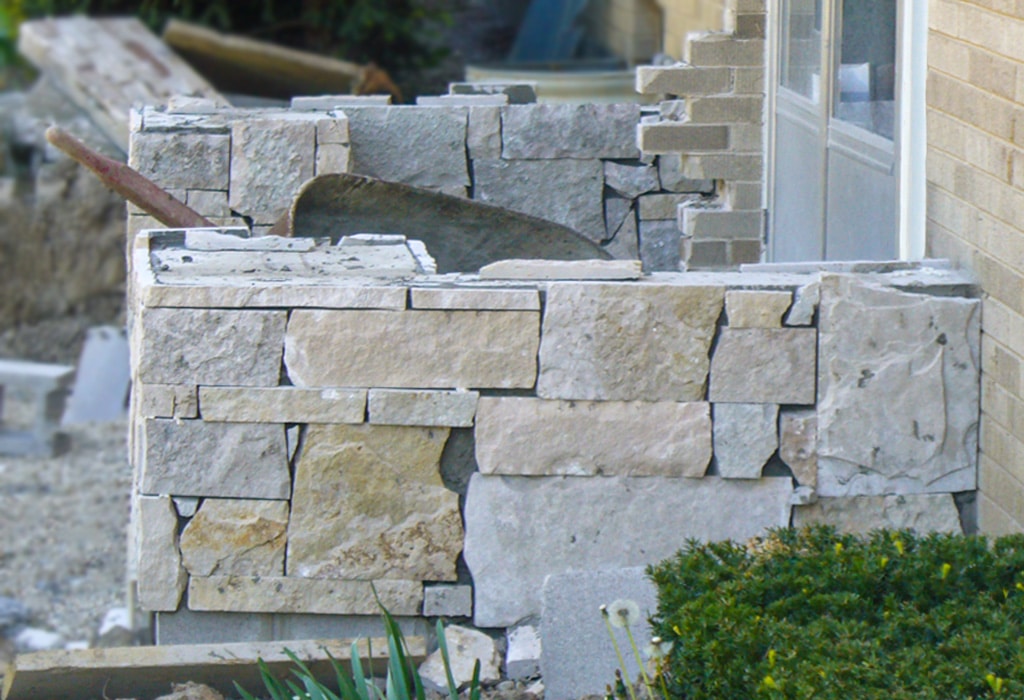
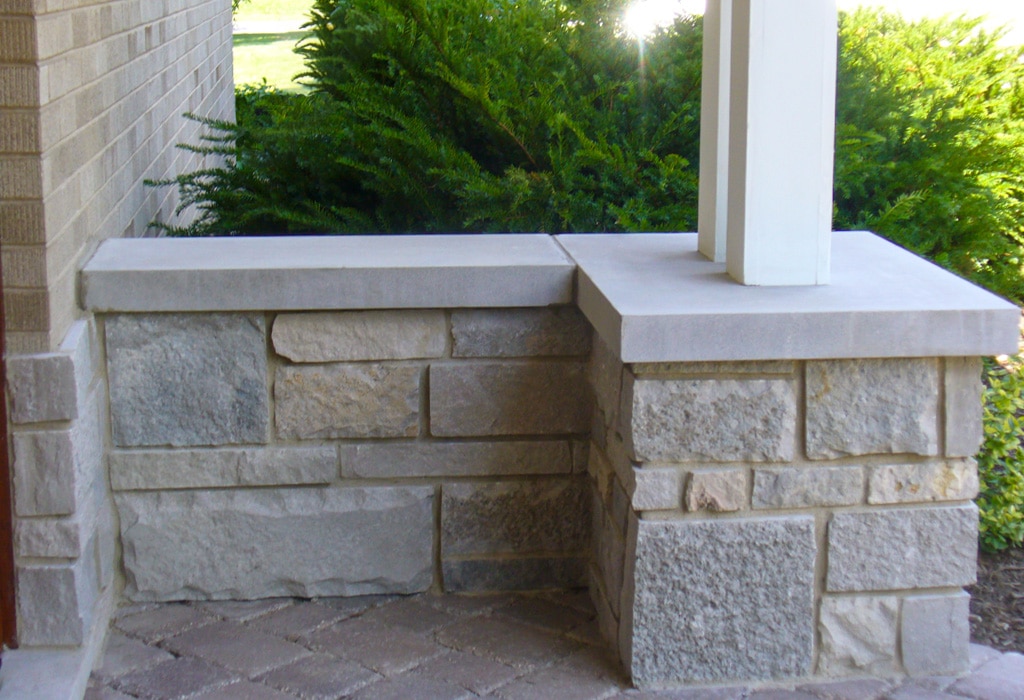
Stone masonry is amazing. If you’ve ever watched a skilled mason doing their trade it’s almost like watching a scripted play, or dare I say a ballet. The skilled movement is a true art form. Of course, a skill like this doesn’t come overnight. There is, however, the ability to do some masonry on your own if you are a little handy and take your time. In this blog I’ll cover a few of the specifics to help your work look good. This will also help you understand why certain stone installations look one way versus another and why some look better than others.

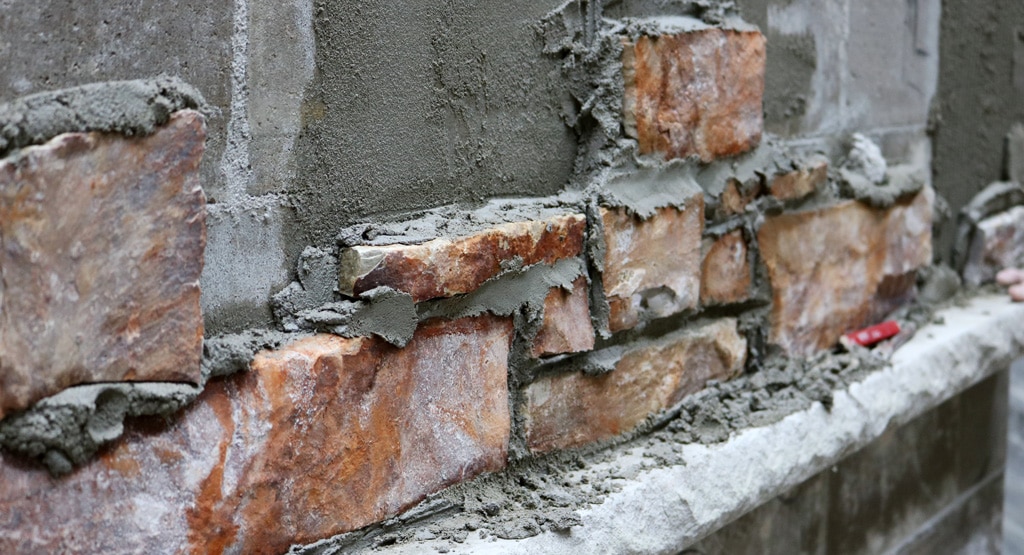
Years ago we made a masonry installation video to give an understanding of the step-by-step process for installing natural thin stone veneer (NTV). If you’ve never watched it, you’ll find a lot of the details that’ll help get you off to a great start (view embedded video below).

The video shows a natural thin veneer (NTV) masonry installation using a Type S mortar mix. Another consideration when selecting and purchasing materials for adhered thin stone veneer would be stone masonry veneer installation products offered by Laticrete. Additionally, Laticrete offers a 15 year and a 25 year labor and materials warranty when following their step-by-step masonry veneer installation(s).

The Details of Good and Bad Stone Masonry

Some of the most important specifics missing from the video have a lot to do with what makes an installation look good. It might seem odd to have to explain some of this, but it’s not as obvious as you might think. Once you know what a good natural stone veneer installation should look like, it’s something you will notice forever when looking at a project that includes building stone veneer products.

Consistent Mortar Joints

The first thing is the mortar joint. You’d think it’s the stone, but it’s this detail that can make all the difference. A mortar joint is a key element. Whether it’s drystacked, raked back, flush, or overgrouted; a bad mortar joint stands out.

What, you ask, is a bad mortar joint? It can come in several forms. One is inconsistency in size. If you’re doing a typical mortar joint, the average installation will have roughly a 1/2 inch joint. Even with bad stone, if you keep the joint consistent it can make all the difference in the world.

stacked stone veneer installation - bad masonry inconsistent mortar joint

Ok, this picture (above) is an extreme and has more than just bad mortar joints going on, but you get the idea. Notice how the joint is inconsistent? It goes from tight to spaced. A diamond saw might have helped save the project; but as you can see, the joint just doesn’t look right. After the contractor was fired from this project a different mason came in and removed and installed the stone. See what a difference it made!

stone veneer wall - natural stone veneer installation

Mortar Joint Finishing

The next thing with joints is how you “finish” them. If you are raking, striking, or brushing your mortar joint; it is important that you do it when the mortar is roughly the same hardness – often referred to as “thumbprint hard”.

how to install veneer - thumbprint hard masonry mortar with real stone veneer

If you strike the joint when it is too wet, it will pull the lime in the mortar to the surface and make the joint lighter than the rest of the joints. The only good thing about this is that it usually evens out so the mortar joints end up matching up over time. In the beginning, though, it freaks a lot of people out.

stone veneer installation - masonry mortar joints lighter from lime

This amazing home (pictured above) features an Antique Bronze Fieldstone stone masonry installation, and also has mortar joints with the lime in the mortar pulled to the surface. Can you see (on the left side) how white the joints are? Like I said, it’s a bit of a freak out in the moment; but at least it’s not a forever problem. These types of issues often come from finishing the work at the end of the day because it can take a long time for the mortar to set enough before finishing the joint. Sometimes masons will use a torch to help speed up the process. It’s effective, you just need to be careful.

Stone Masonry Styles & Patterns

The next thing to consider is the style of stone you are installing. It may not look like it, but there is a method to the madness in the installation. There is actually a pattern for the different stone types.

An Ashlar Line pattern of installation is sometimes referred to as a 2:1 pattern. This is as it sounds, 2 smaller stones to 1 big stone.

ashlar pattern stone veneer installation - wall stone veneer

The above sample swatch of Chilton Custom Country Blend illustrates a 2:1 pattern. It’s a product in our Ashlar Line, but many different stone product types can be installed this way – with two stones butting up to one and creating a vertical joint. This does a couple of things. First, by installing stone pieces in this way it breaks up the joints so they don’t run into each other. This also helps keep the horizontal joints from forming long, coursed runs. The other thing to notice is the variations on the vertical joints. A good rule of thumb is to have a minimum of four inches between vertical joints to keep from having the vertical joints run a long distance up and down; instead they should be staggered.

The next type of stone masonry installation is what we call a Mosaic installation. The same rules pretty much apply here with joint sizes, and not having the joints running too long vertical or horizontal. The one difference with a Mosaic Line pattern (sometimes referred to as irregular) is you have to watch “the crotch” of the stones.

mosaic fieldstone building stone veneer masonry pattern - how to install stone veneer

Basically, when the stones line up with each other what you want to watch for is a big triangle showing up in the joint because the stone shapes don’t line up well. The above swatch photo for Antique Copper Fieldstone is a pretty good stone masonry installation. Areas where the crotches of the stone pieces are a little bigger than they probably should be are indicated by white triangles. You can see the joint between those stones is a little bigger than the rest. It’s not bad – just not as good as it could be.

Types of Mortar Joints

The final detail we need to address is the different types of mortar joints – raked, flush, overgrout, drystacked, and etc. There are a few others that are more old school, but we’ll stick with the basic ones for now. Below are four pictures of Chilton Country Squire – each having a different mortar joint.stone masonry mortar joint examples: standard raked, flush, overgrout, drystack or stacked stone

1. Standard-type / Raked Mortar Joint (Gray)

Image 1 shows a standard-type mortar joint. It has a gray mortar. This type of joint is often called raked. There are a lot of ways to accomplished this finish, from using a piece of wood or a tuck pointer. Once the mortar is thumbprint hard (pictured earlier in this press & blog post – a consistency where you can press into it and basically see your actual thumb print) you would use the tool of choice to scrape the mortar out about a 1/4 – 1/2 inch back. Then use a stiff brush to clean the bits of excess mortar off. This also helps seal up the joints and prevent hairline cracks.

2. Flush Mortar Joint (Buff)

Image 2 has a more flush joint. It also has a buff-colored mortar, which affects the look of the final installation. In this application, the mortar is almost flush with the face of the stone, but doesn’t cover the face.

3. Overgrout Mortar Joint (Buff)

Image 3 has an overgrout finish. It’s similar to a flush joint, but in this installation you use a trowel to press mortar over the face of the stone, covering part of the stone pieces. This is similar to old stone masonry techniques when masonry was used in building projects for the actual structure (like the stone masonry wall shown below), and not just used to make the project look good. Once the mortar is pressed into place with the trowel, you then brush it to help prevent hairline cracks. Some people like to just strike the joint with the trowel, to keep a smoother finish; just make sure the mortar is all at a consistent “hardness” when doing this type of installation.

building stone veneer of church showing structural stone masonry

4. Drystacked Mortar Joint

Image 4 is a drystacked installation. As you can see, there is almost no mortar showing. One advantage of a drystack joint is there is no waiting for the mortar to dry, so you can work right up to the end of the day installing. The most difficult part of this install is the effort it takes to make the stone look good. It is important to have a grinder or diamond to help grind down high spots. This will help the stones fit tighter together. Also, you do have to be a little more cautious about using this installation for exterior applications, because water can get behind the stone much easier; making it even more important for you to incorporate our weep system or use Laticrete’s MVIS products.

Your Best Resource for Stone Masonry Information

So there you have it – those are the basics! If you’re considering installing stone on your own, the biggest thing is to take your time and don’t rush the process. If you do have questions, work with your Buechel Stone rep to help with some of the details. They’ll be a great source of information and help keep you pointed in the right direction.

JOIN OUR NEWSLETTER to be notified of everything our team of Buechel Stone #Rockstars is doing to ensure a future built by your own project success stories. We’ll also let you know when we showcase new TRUE STORIES of fellow creators that have inspired more than just our industry! Because quality products are just the beginning. And providing best experiences is what gets us out of bed every morning – making Buechel Stone your ONLY REAL CHOICE in STONE.

Mike Buechel
COO, Owner
Buechel Stone Corp.

*Editor’s Note: This post was originally published Apr 25, 2013, and has been revamped and updated July 20, 2018.