“We can throw stones, complain about them, stumble on them, climb over them, or build with them.”
– William Arthur Ward
The funny thing about this quote is that as a novice backyard landscaping retaining stone wall installer, I’m pretty sure all of the above happened during the course of our dry stacked stone project. I am no expert in a lot of general trades. The “Jack of All Trades, Master of None” definitely fits the bill on my abilities. There’s something to be said about the pride there is in doing a job on your own, although as I’m getting older, I sure do appreciate times where you can write a check and have the job done. My problem tends to be I often feel a little guilty having someone do a project I know I can do myself. I don’t know why, but I like doing the work. So far this spring, one benefit of being locked down at home is we are getting a ton of work done around the yard. One of my negatives when doing my own work is the tendency to jump from project to project… maybe at about 75 percent completion. So far this year, that hasn’t been the case; I’m checking off Nikki’s to-do list with completed projects at a great clip!
How to build a dry set / dry stacked stone wall for any front or backyard landscaping climate
I’ve often realized there’s not a lot of great information for the average person on installing a dry set stone retaining wall. One thing people will often ask is if they can do a mortared wall for retaining soil. You can, but there are a few caveats to this. If you live in an area with strong freezing and thawing, you need to do a lot more base work (like pouring a slab). If you live in a warm climate, it’s no problem.
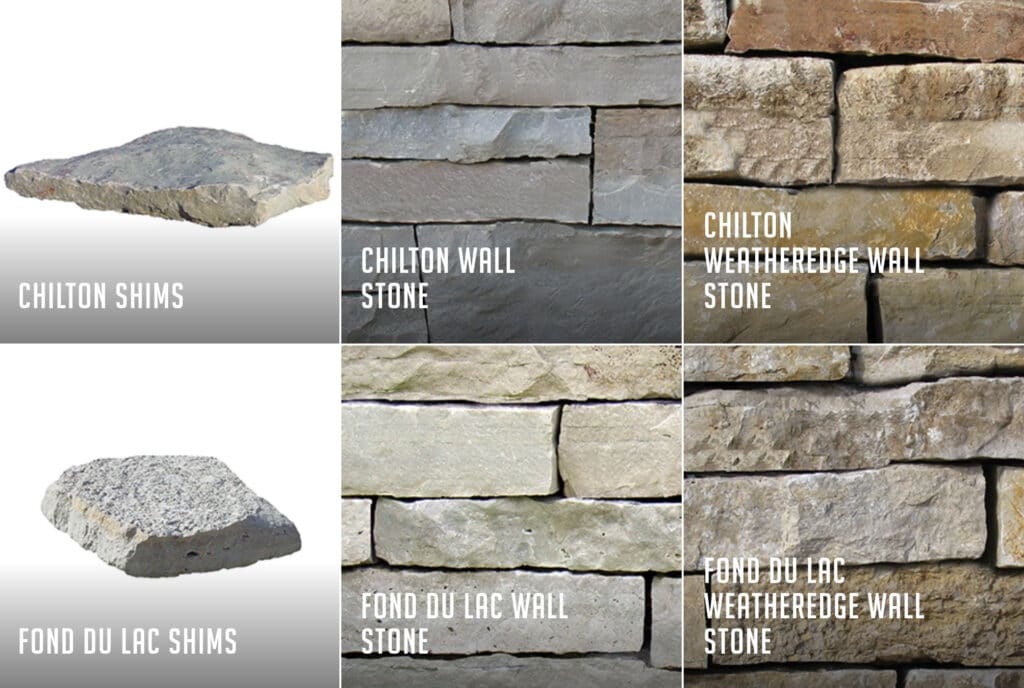
I did a dry stacked stone wall because it will hold up forever in our climate when installed correctly. It can feel like a daunting task, but not one that is insurmountable. One of the big tasks is figuring out and planning all of the necessary materials. A reputable stone yard should be able to help you with the basic products required. The big things to know are how many square feet (face of the wall) you’ll be installing, what type of soil you have at the site of the stone wall (sandy, clay, subsoil, etc.), and how high the wall will be. These three things can get you started with estimating your retaining wall landscape project needs.
Remember, there’s no shame in hiring a professional landscaper for a project like this. If you’re concerned or just not sure it is a project you can tackle, that’s ok. This one isn’t for every DIY’er. If you are doing it yourself, spend the money on tools and rentals to make the project easier. I admit, I am very lucky to have access to tools and equipment to help.
DIY backyard landscaping retaining wall / dry stacked stone wall supplies
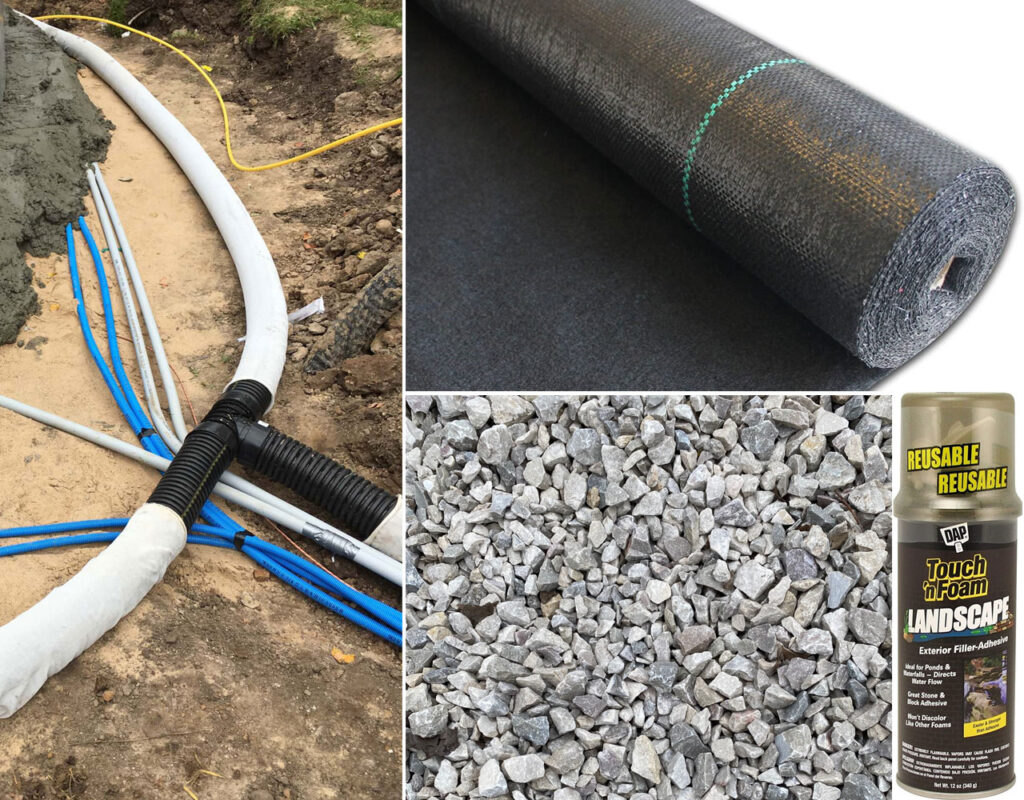
There are a couple of items that aren’t always recommended or included in a backyard patio retaining wall stone design, but I feel are good to include for the (low) cost. A few key products are 4″ drain tile for behind the wall, landscape fabric for between the clear stone and soil, a 3/4″ clear chip (do not use rounded stone as it does not interlock the way clear chip does), and a landscape adhesive to glue the top row. To me, these are cheap investments and will make for a better functioning dry stacked stone wall.
There are two items that you can’t skimp on – the wall stone (obviously) and the base. For the base you should use a crushed stone. Some people like to use screenings, which are very small. Others will recommend a 3/4″ dense (minus, road gravel, etc…). The biggest thing is to make sure and add a base.
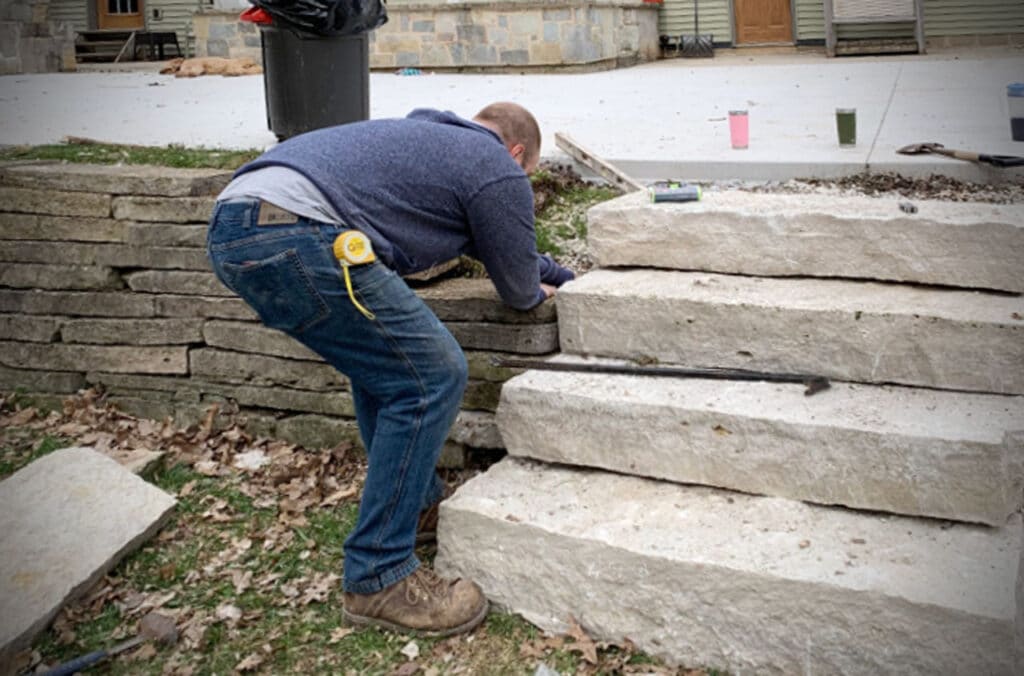
Now that you have the stone, it’s time to get moving! The base of the wall is critical and, in my opinion, the most work. Nikki and the kids did a great job shoveling the base while I installed patio stone steps.
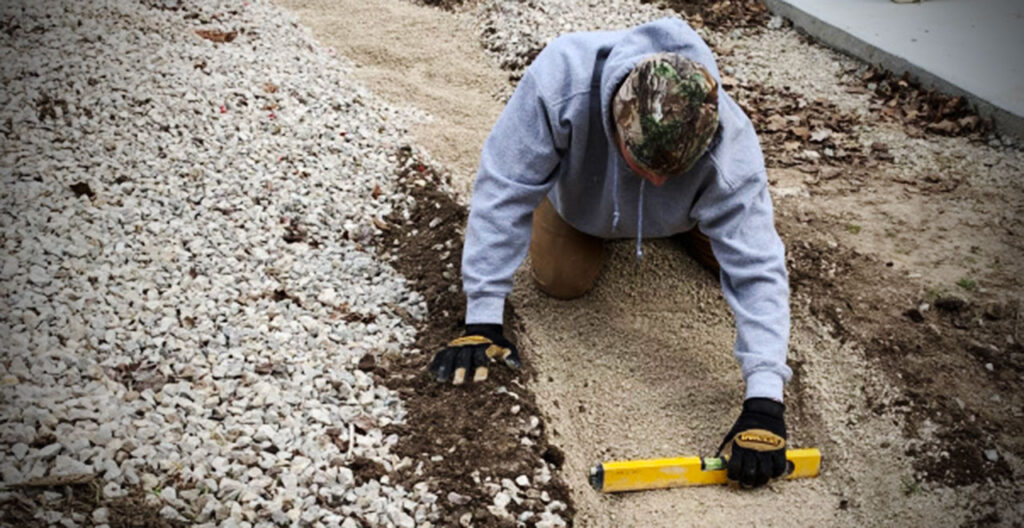
How to build a good base for front or backyard landscaping dry stacked stone retaining wall
The base should be dug out at least twice as wide as the width of the stone. So in my case, the stone was cut to 12″ wide making the base 24″ wide. The depth and amount of base material has a lot to do with the type of soil and size of the wall. When retaining walls get tall, or the soil isn’t ideal (like clay or sand), you may need to have an engineer assist with best practices. I know it doesn’t sound ideal, but a landscaping retaining wall is something you only want to do once.
When adding gravel for the base, you should do it in “lifts”, or layers. The best way is to add two inches at a time. Put down two inches and run a plate compactor over the gravel several times until you can’t press into it. Do this until you get to your desired base thickness. You will also need to bury some of the stone. I usually bury about 2″ per foot of total wall height. I don’t know if that’s good science, but it has worked well for me.
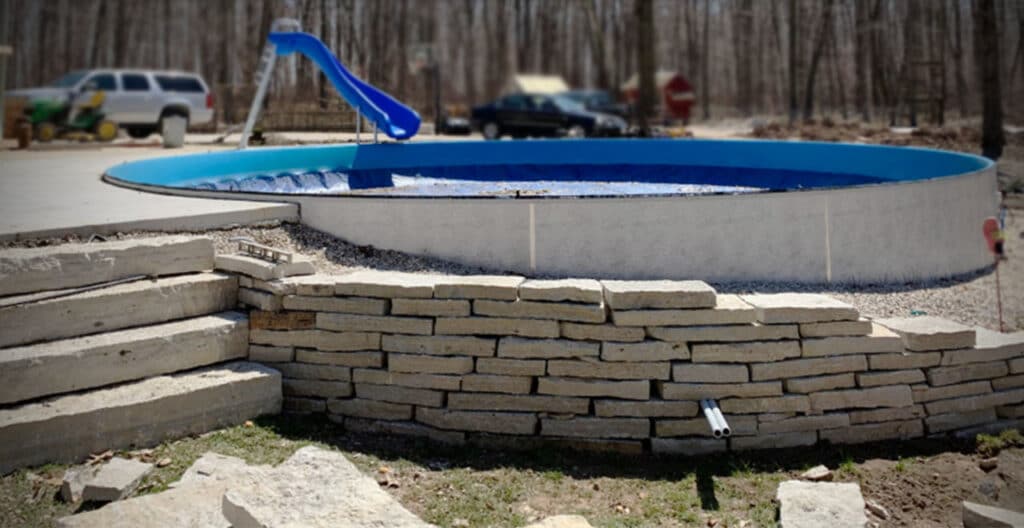
Clear gravel was placed around the pool when it was installed. One of the earlier photos showed where a 4″ drain tile was installed. The tile drains into a sump tank to handle the rush of water. It is key to get water away from the retaining wall stone. Water will do damage over time, especially when it starts to freeze. Now that the base is installed and the drain tile is ready, you can start installing the natural stone wall.
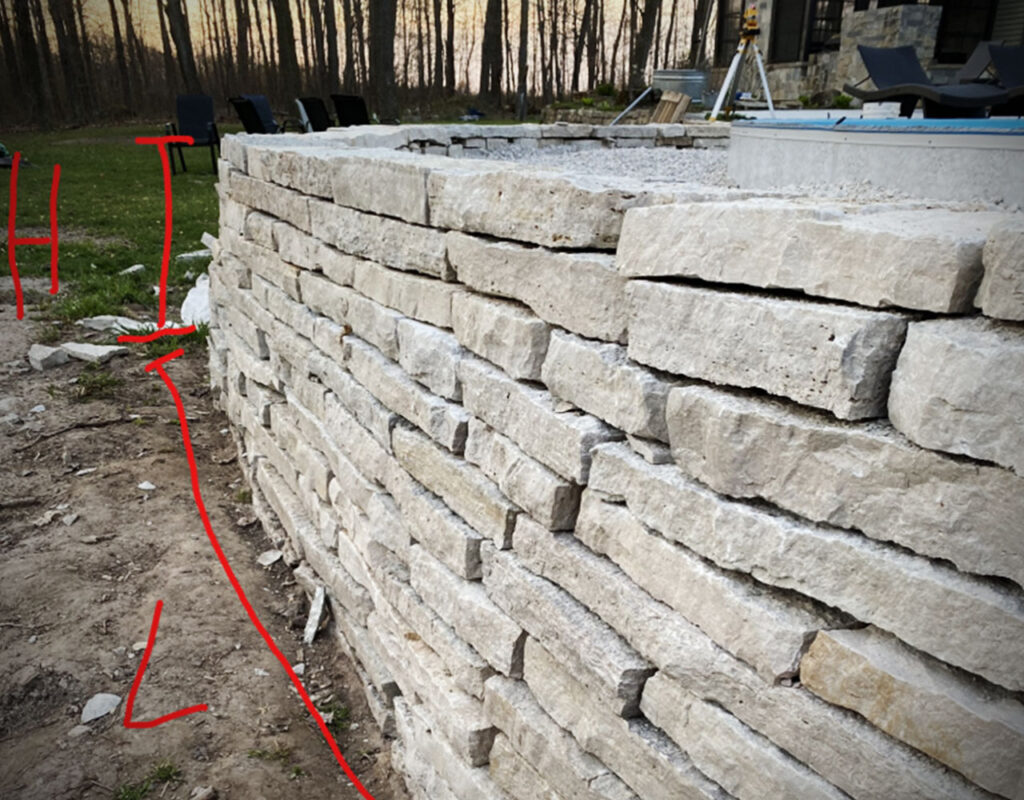
How to install a natural stone retaining wall for backyard pool, outdoor patios, gardening terraces & more | built for beauty & longevity
At this point, you keep going – stone by stone. A grinder with a diamond cup head will help if there are larger knobs on the stone. You can also use your hammer and chisel to chip them off. A couple of things that I find important when installing a wall:
- Keep vertical joints from being directly over each other. This can be difficult to avoid, and is ok from time to time. Just know the retaining wall is not as strong if you have a long vertical joint.
- It’s recommended to have at least 4 inches between vertical joints.
- You may need to cut some of the stone to make a radius. The best looking walls have minimal “windows” (where there is a gap between the stones on a row).
- As you go up a row, set it back about a 1/4″ or so each time. If you build the wall completely straight/plumb there is a pretty good chance that over time it will tip out and fall over.
We were lucky. The weather was amazing and we were able to get the project done in a pretty short amount of time. This is about the tenth wall Nikki and I have worked on throughout our almost 30 years together. We’ve become a lot more tolerant of each other, and dare I might even say we had a pretty good time doing this project.
Next up on the list? Well, the list is not getting smaller. We do have a couple of pretty exciting projects we want to do this summer, so check back later to see what we accomplished this year!
Join Our Newsletter, follow us on your favorite social media platform (Facebook, LinkedIn, Twitter, YouTube, Pinterest), or keep an eye on our Press & Blog for more how-to and DIY tips. You’ll also find exciting updates on new natural stone products and details for the grand openings of two new Buechel Stone design centers in the coming months – for best experiences throughout the selection process of full and thin stone veneers, architectural cut stone, and landscape stone selections. With so many new and exciting things happening at Buechel Stone, you won’t want to miss out on more best experiences ahead. Heck, we’re all just looking for a reason to finally be able to get out of the house and do something exciting again – maybe making an in-person natural stone selection will be in your future!
Mike Buechel
COO, Owner
Buechel Stone Corp.
*Editor’s Note: This post was originally published to Mike Buechel’s personal blog May 13, 2020; and has been adapted for the Buechel Stone Press & Blog May 14, 2020. Follow Mike Buechel and/or Buechel Stone on LinkedIn for more articles and stories about everything Buechel.